Setup & Foundation
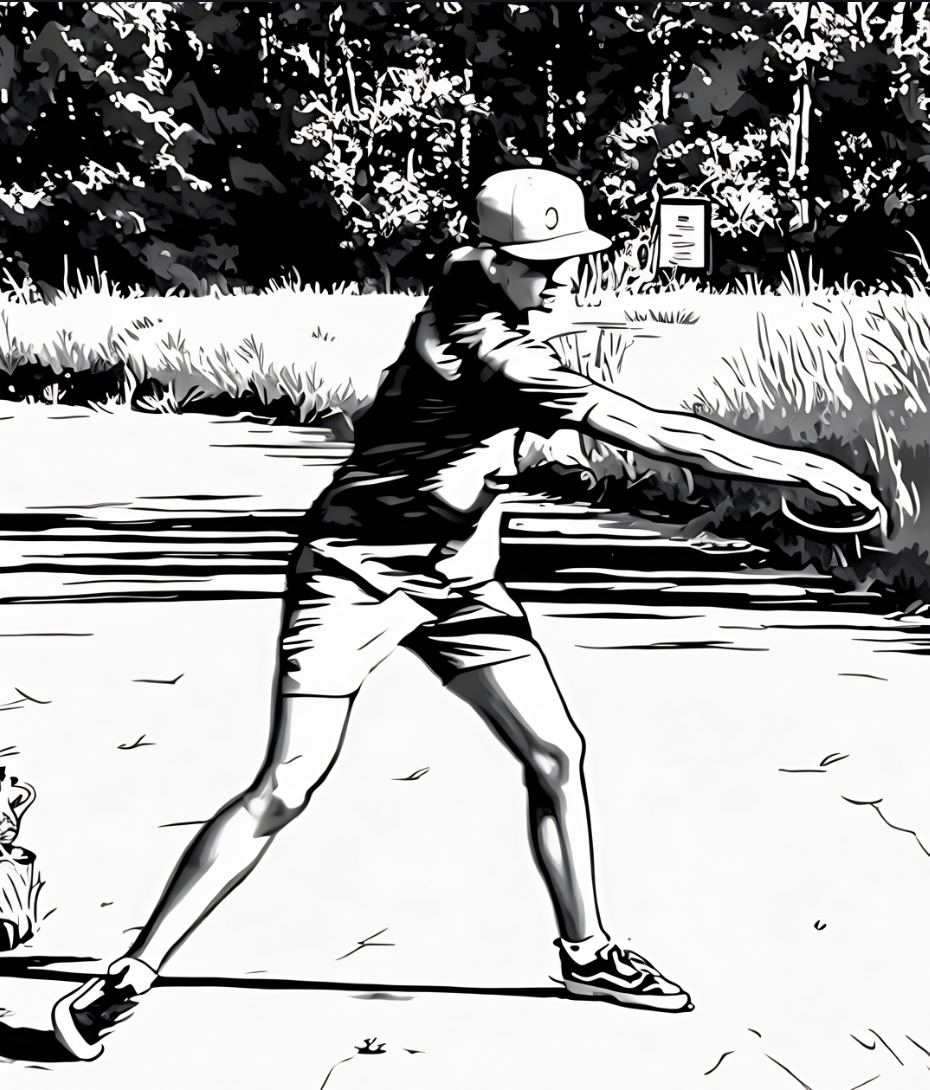
Step 1: Forehand Grip & Disc Angle
- Two fingers inside the rim: place your index and middle finger pads against the inside of the rim, pressed firmly into the rim wall or flight plate. Your ring and pinky fingers can rest relaxed along the rim or under the disc for support.
- Thumb presses down over the index finger: thumb should sit on top of the disc roughly above the index finger, creating a solid pinch. Avoid letting the thumb slide too far toward the center.
- Neutral wrist to start: don't crank your wrist back hard. Start with a relatively neutral wrist, then allow a slight hinge as you load into the motion.
- Disc angle matches your intended line: for a flat forehand, keep the disc parallel to your forearm. For hyzer/anhyzer, tilt the disc with your wrist + forearm together, not by bending just the wrist.
Quick cue: Strong pinch, two fingers in, disc on the same line as your forearm.
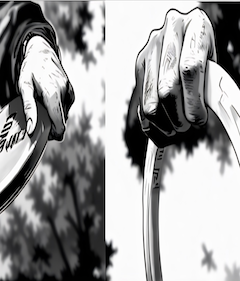
Forehand grip: two-finger pinch and thumb placement
Disc angle control: matching wrist and forearm
Step 2: Stance, Alignment & Spine Tilt
- Sideways to the target: set up with your chest mostly facing sideways to the target, throwing shoulder (right shoulder for RHFH) slightly pointed toward the line.
- Feet staggered, not on a tightrope: front foot slightly ahead and a bit wider than shoulder-width. Avoid standing on a straight line—give yourself lateral space.
- Gentle forward spine tilt: lean slightly forward from the hips, not from rounding your upper back. This keeps your swing on a clean plane and prevents skyed shots.
- Relaxed upper body: shoulders loose, elbow down at your side, no tension in the neck. Think "ready to skip a stone," not "trying to throw a fastball."
Quick cue: Sideways, balanced, slight forward lean—like you're skipping a stone.
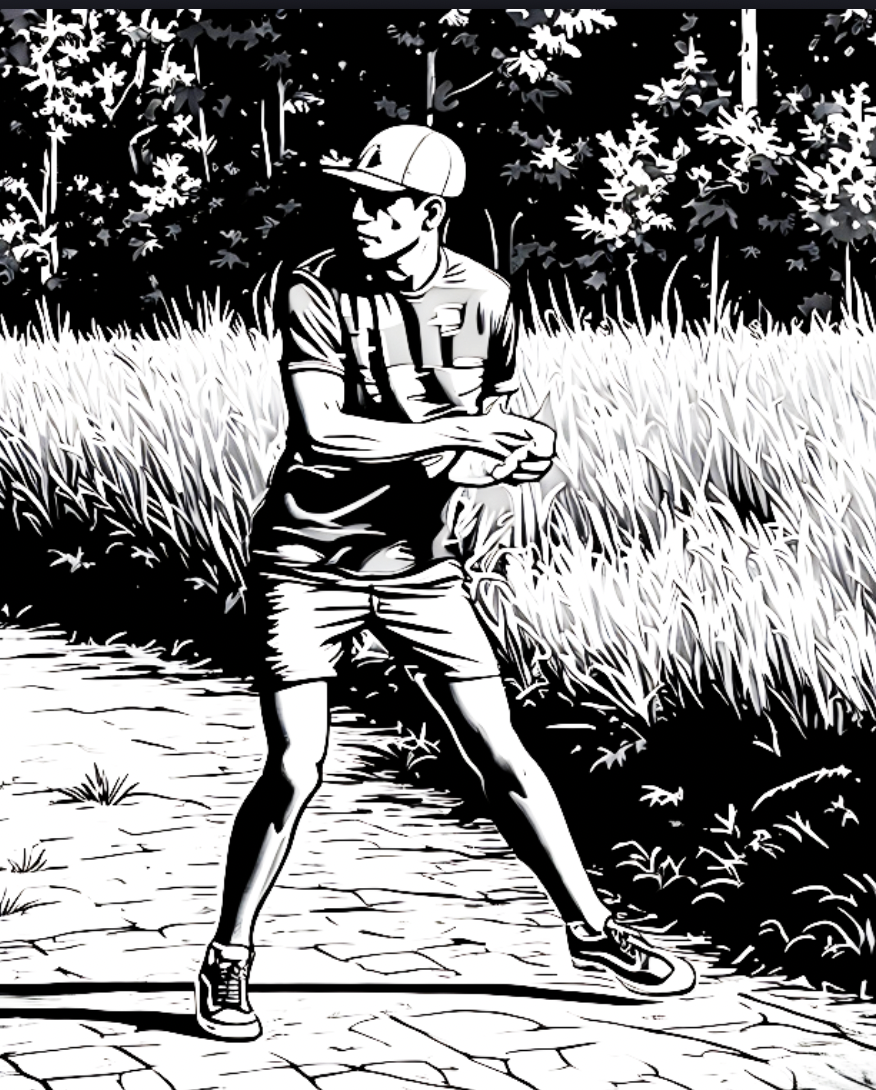
Sideways alignment and balanced base
Forward lean and relaxed posture
Motion & Timing
Step 3: Load Into the Back Leg & Hip
- Weight starts centered, then shifts back slightly: begin balanced, then let a bit of weight settle into your back leg (for RHFH, right leg) as you prepare to swing.
- Coil through the hip, not the shoulder: rotate your throwing-side hip slightly back while keeping your chest relatively quiet. You should feel a stretch across the side of your core.
- Short, controlled step into the plant: as you step into your front foot, keep it small and controlled. No big lunges—those pull you off line and stress the elbow.
- Ground-up sequence: think: back leg → hips → torso → arm → wrist. The arm and wrist should feel like they're trailing the body, not leading it.
Quick cue: Load the back leg, turn the hip, then let the arm follow.
Hip coil and ground-up sequencing
Controlled step and weight transfer
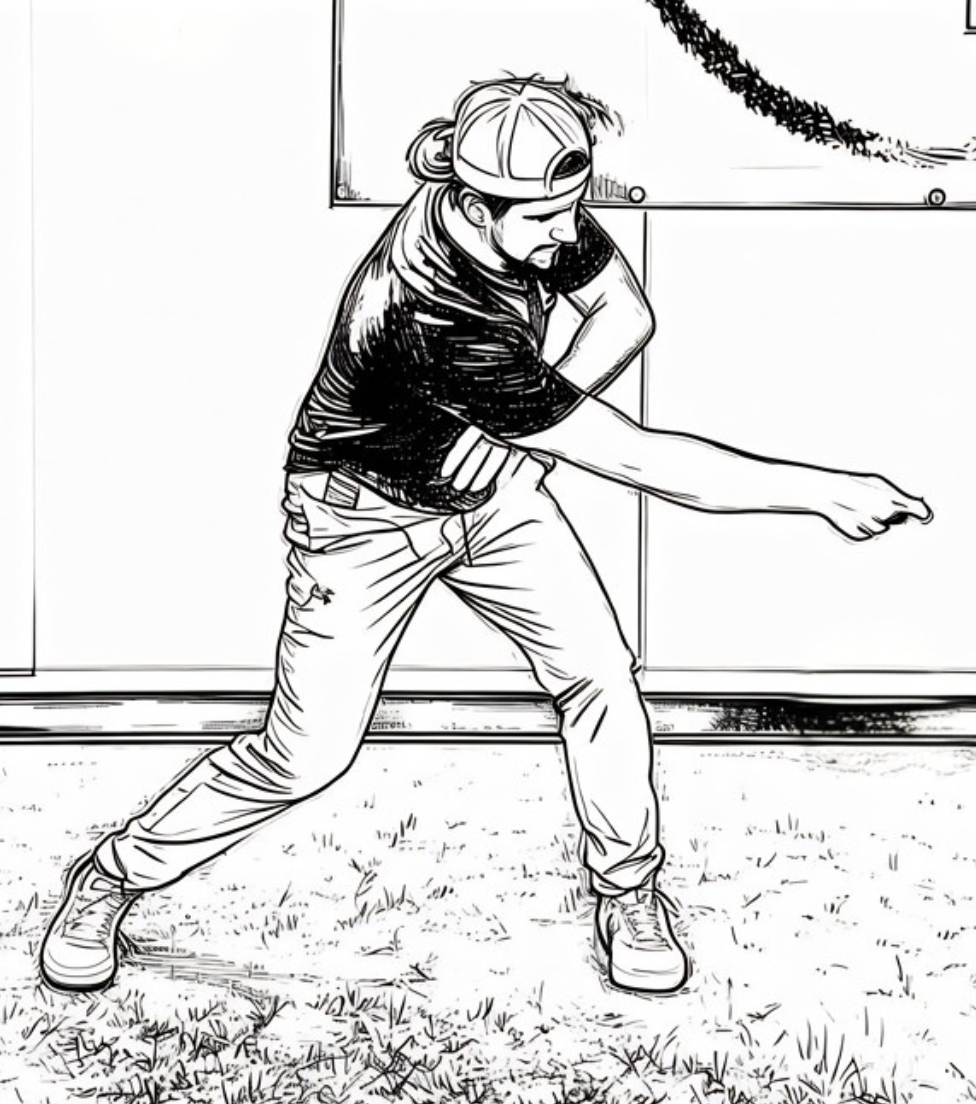
Step 4: Sidearm Swing Path & Elbow Lead
- Swing along a gentle arc, not straight across your chest: the forehand path is more like a sideways arc than a linear pull. The disc travels slightly out and forward, not across your body.
- Elbow leads the hand: as you swing, let the elbow move forward slightly ahead of your hand. This creates a compact "pocket" before the wrist fires.
- Disc near the right side of your body (RHFH): avoid swinging way out away from your torso or way behind you. Keep the disc roughly in line with your throwing-side ribs.
- Keep the shoulder low and relaxed: don't shrug the shoulder up toward your ear. A relaxed shoulder keeps the swing smoother and safer.
Quick cue: Elbow leads, smooth side arc, shoulder stays low and loose.
Side arc and elbow-leading motion
Relaxed shoulder and compact swing
Release & Follow-Through
Step 5: Wrist Snap & Clean Release
- Let the wrist hinge, don't force it: as your body rotates and the elbow leads, the wrist will naturally lag and then snap forward. Feel it as a hinge, not a forced hyper-flex.
- Finger spring sends the disc: the disc should rip mainly off your index/middle finger pads as the wrist unhinges, not fall out early or wobble from a weak pinch.
- Release out in front, not behind you: the disc should leave your hand roughly in front of your throwing shoulder, pointed at the target line—never back by your hip.
- Match your disc angle to your intent: practice flat, hyzer, and anhyzer releases slowly so you can feel what each wrist/forearm angle produces.
Quick cue: Let the body start it, let the wrist finish it—don't force the flick.
Natural wrist hinge and finger spring
Release point and angle control
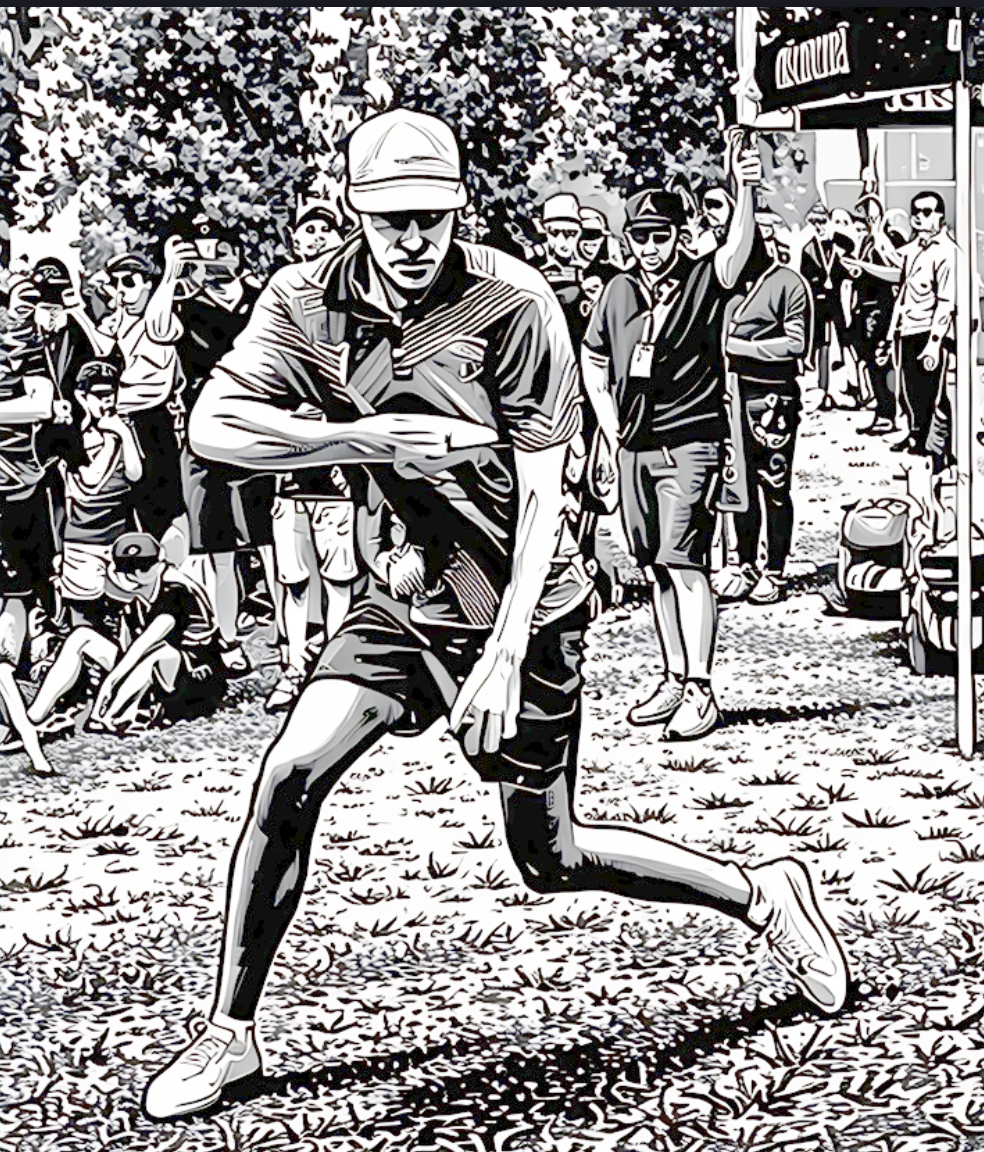
Step 6: Safe Follow-Through & Injury Prevention
- Arm decelerates around your body, not locked out: after release, let your arm continue moving and wrap across your body or down and away—it shouldn't slam to a dead stop.
- Let the back foot come through naturally: allow your trail leg to step through or pivot so your hips and torso can unwind fully.
- No violent "chop" straight down: if your arm is chopping down hard after release, you're probably overusing elbow extension. Smooth out the arc and rely more on rotation.
- Start at 50–70% power: build a clean pattern first, then add speed. If something hurts, you're likely muscling it or out of sequence.
- Prioritize comfort and repeatability: a slightly shorter, smoother forehand that you can throw all day is more valuable than a max-effort rip that hurts.
Quick cue: Let it swing and finish; don't slam the brakes with your elbow.
Smooth follow-through and safe deceleration
Building power gradually and safely
Want to put it into practice? Try the One-Step Drill to sync your footwork and timing.